I never realized the different things you had to do in order for a piece to be properly prepared for printing. I learned about what indesign should be used for, and what it should not be used for. Example: do not re-size images in indesign, and make sure the file is properly saved. I also learned how to make sure the colors on your computer come out the same once printed. You should make sure everything is CMYK, and only use pantone colors. Overall, I learned a significant amount about printing, and I feel much more confident in preparing pieces for print.
One thing I wish we would have gone over more is the image master list, because that is an important part of the class. I also think the first project should be done for participation points, but graded as if it were a real project so the student knows what to do different.
Again, this was a great class and I feel a lot more prepared to be out in he real world.
Wednesday, December 14, 2011
Tuesday, December 13, 2011
Final Project
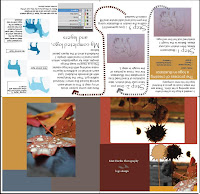
For my final project I created a 34x33 poster (front and back) that folds down into smaller sections. My target audience is photographers, both professional and non-professional; People with an interest in outdoor/nature photography. Target age is young to old, whoever is interested in photography.
Project Specs:
34 x 33, fully open
Horizontal fold lines at
~8", ~16", ~24"
Vertical fold lines at
8.5", 17", 25.5
.25 margin
.125 bleed
4-color
Price Quote for printing:
Completed final project:


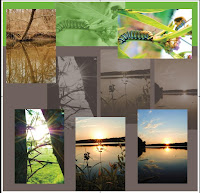
All of the images used on my project were taken by me and copyrighted to me.
Project Specs:
34 x 33, fully open
Horizontal fold lines at
~8", ~16", ~24"
Vertical fold lines at
8.5", 17", 25.5
.25 margin
.125 bleed
4-color
Price Quote for printing:
Completed final project:


All of the images used on my project were taken by me and copyrighted to me.
Subscribe to:
Comments (Atom)
